How to Draw a Panda Step by Step
A mistake many beginning artists make is being very rigid about the use of their references. The point is not just to trace or try to perfectly capture the reference, but rather to create a mental image or framework for what you're trying to draw. It's similar to learning the guitar: First you reference chords and, over time, they are baked into your muscle memory. You want the features of your reference material to be stored in your mental library.
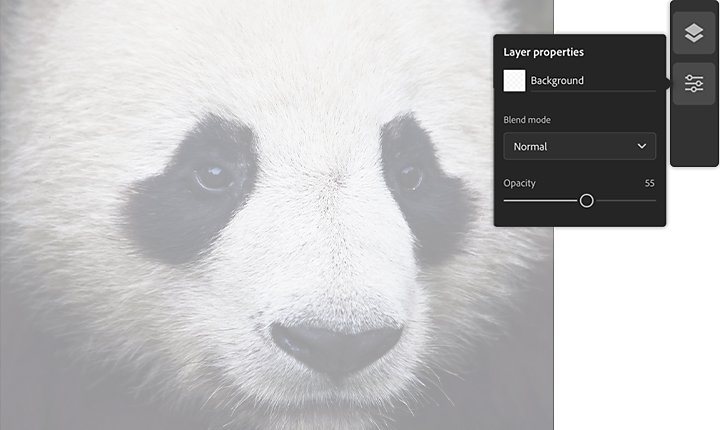
But where to find a good reference? Adobe Stock is an excellent resource to start with. You'll be able to find thousands of reference pandas within the Stock library. From there, select the heart icon to save the images you want, and then pull them from your Adobe Creative Cloud to your Adobe Fresco canvas, where you can superimpose the image in the background to assist with your drawing.
Start with the basic shapes.
When you build a sketched framework of a panda, like many drawing activities, you'll realize there are common themes and features in your reference materials. With pandas, it's circles. Lots of them.

Image by Chioma Iloegbunam
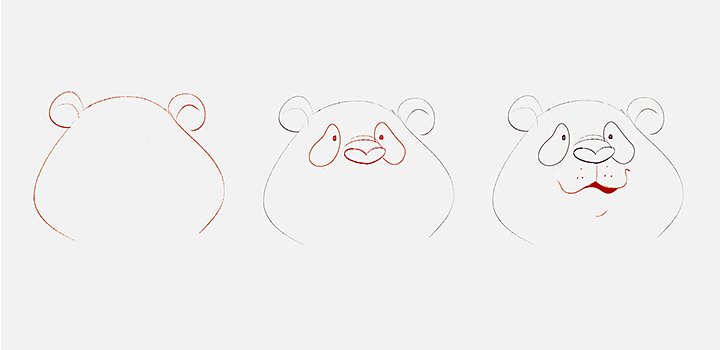
Start with the head.
The head is where the fun begins. Draw some circles, the first one for the head, and then a couple of small circles for the ears. Give the head circle a little bit of taper. "For pandas, their heads are typically tapered from the top. That's because they carry most of the weight in their face at the bottom of their head," says artist Chioma Iloegbunam.
Add that small amount of taper to help you practice incorporating weight into a drawing. Plus, it's part of what gives pandas their signature look.

Image by Chioma Iloegbunam
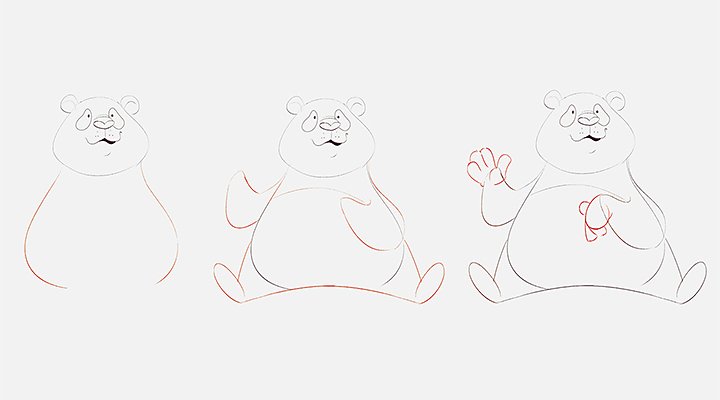
Move to the body.
Time for more circles. Depending on the pose you want your panda to take, make a large oval and connect it to the head from various angles to determine its posture. This will also give you the opportunity to take the drawing in a photorealistic or in a more cartoonish direction. If you want a cartoon panda, a big oval underneath the head will make your panda look like it's sitting. Place it more to the side to create a side profile.

Image by Chioma Iloegbunam
Add in the legs.
The legs are the last part of the sketch, which for some might be the most difficult part. The legs need to be drawn to match the head and body shapes. But, generally speaking, panda legs are going to have a more teardrop shape. Sketch these in different positions on your panda's torso until you get the proportions and positions right. Once you have your basic pose and body shape, you're ready to refine.
Refine with Fresco techniques.
With your initial sketch complete, you're now ready to add detail to your panda. The beauty of the digital medium is that you can use layering to refine your drawings. Layers are like transparent pieces of paper that you can draw on and stack in various configurations. Your sketch in Fresco is likely on a single layer, and you can add as many layers on top of it as you need to get your drawing where you want it. Suggestions for layers include one for linework, one for detail, one for base colors, and one for shadows. But you can create as many or as few as needed to enhance your creative process, and then remove any layers you don't want in your final piece.
Create a layer.
Press the "+" button to create a layer in Fresco. The new layer will automatically be created on top of all of the others, so you can start drawing. Feel free to adjust the position of the layer in a way that makes sense to you.

Opacity and detail refinements.
Lower the opacity settings to make your original sketch appear fainter in the background so you can draw your detail refinements over it. Use the Layer Properties menu to adjust the opacity to a level you want to work with and use as a guide.
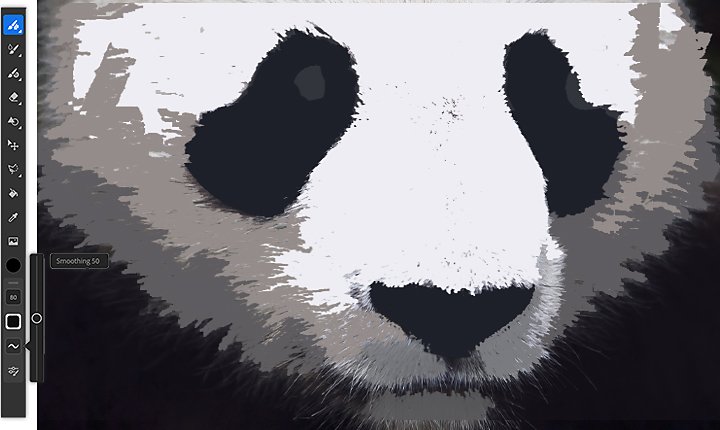
For detail work, Fresco gives you a large suite of tools for your linework and detail refinement. The pencil tools can be a great way to add fur along the exterior of your panda shapes (try the Rough Pencil brush) or use the Watercolor or Oil live brushes to add heavy or lighter flourishes to the lines of your panda.

Colors.
Finally, add colors to your panda. Pandas are mostly monochromatic, meaning that you're going to be working with black, white, and shades of gray. (While not closely related to the giant panda, seek out a reference of a red panda if illustrating the reddish-brown fur of this cat-sized creature is your aim.)
And don't mistake the use of monochrome for lack of detail. Plenty of nuances and textures can be added. "In the white areas, use a light warm gray, and then in the black areas use a medium-toned, cooler gray," artist Terryl Whitlatch suggests. "It will give a nice contrast in the final result."
Whether you're trying to draw a giant panda, a cute panda, or another four-legged animal, Fresco can be a powerful tool to help you build your drawing skills.
sutherlandfoliver.blogspot.com
Source: https://www.adobe.com/creativecloud/illustration/discover/how-to-draw-a-panda.html
0 Response to "How to Draw a Panda Step by Step"
Post a Comment